From flat sheet to shaped part
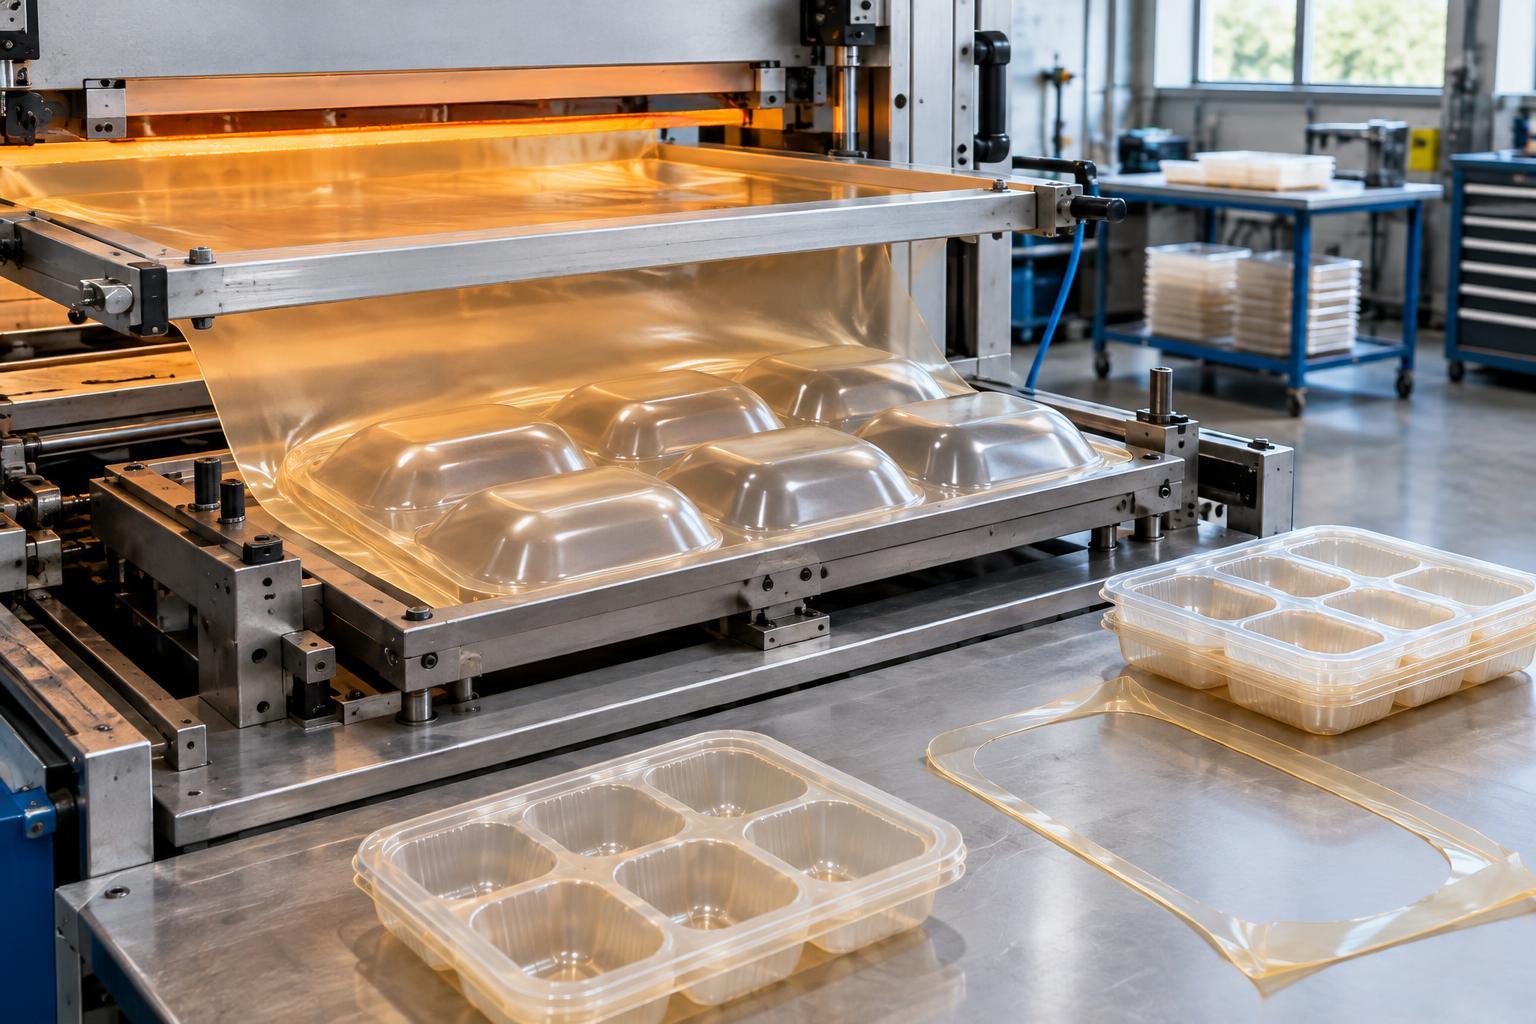
Thermoforming starts with a plastic sheet rather than melted plastic injected into a closed mold. The sheet is held in a frame and heated until it becomes pliable. It is then drawn over or into a tool, cooled until it holds its shape, and removed. The formed part is still connected to surrounding sheet material, so a separate trimming step creates its final outline and any openings.
This sequence makes thermoforming well suited to broad, relatively thin parts such as food trays, protective packaging, equipment covers and appliance liners. A forming tool may be simpler than an injection mold for a comparable shape, but the process is not automatically the cheapest option. Material use, trimming, part size, production volume and required detail all affect the choice.
How the sheet takes the tool’s shape
The simplest version uses vacuum to pull air from between the hot sheet and the tool. Atmospheric pressure pushes the sheet against the tool surface. Pressure forming also applies compressed air above the sheet, helping it follow finer details. For deeper shapes, a plug can push the softened sheet partway into a tool before vacuum or pressure finishes the form. The right approach depends on the shape and the level of detail needed.
Heating and cooling need attention. If a sheet is too cool, it may resist forming or fail to reach corners. If it is overheated, it can sag excessively or thin more than intended. Once formed, the plastic must cool enough to keep its shape when released. Heating time, sheet temperature and cooling time can therefore influence both part consistency and production speed.
Why shape affects wall thickness
A sheet stretches as it travels into a cavity or over a raised tool. That stretching means the finished wall is rarely the same thickness everywhere. Deep draws, sharp corners and narrow features can leave some areas thinner than others. Starting with a thicker sheet may help, but it can also add material and weight without fixing an uneven stretch pattern.
Designers often use generous corner radii, gradual transitions and a suitable draft angle—the slight taper that helps a cooled part release from the tool. A plug assist or a change in how the sheet first contacts the tool may improve material distribution. These choices matter when a tray must support its contents or a shell must keep its shape during handling. Checking a prototype’s thinnest areas is usually more useful than judging strength from the original sheet thickness alone.
Choosing a sheet and finishing the part
Thermoforming materials are selected for the job the part must do. PET is commonly considered when clarity is important; polypropylene can suit parts that need flexibility and suitable heat performance; and polystyrene is another option for packaging and display applications. Specific grades differ, so a material name alone does not establish how a finished part will behave. Surface finish, color, food-contact requirements where applicable, and the way the part will be handled also shape the choice.
Trimming may be done with a die, a router or another cutting method, depending on the part and production setup. The cut edge deserves attention: rough edges, inconsistent flanges or misplaced openings can interfere with stacking, sealing or assembly. The offcuts are part of the material-use calculation. Whether they can be reprocessed into suitable sheet depends on the material, cleanliness and quality requirements.
What to check before scaling up
A useful trial does more than show that a part can be formed once. Compare parts for consistent dimensions, even appearance, reliable release from the tool and acceptable thickness in demanding areas. If trays must stack or shells must fit another component, test those interactions with actual samples. Tool vents, sheet positioning and trim alignment may need adjustment when results vary.
Thermoforming is a practical way to turn sheet into useful three-dimensional products, but its strengths come with a central constraint: forming redistributes material rather than placing it exactly where needed. Understanding that trade-off helps teams design shapes that form reliably, use material thoughtfully and work as intended after trimming.